


The following sections included on this page, are for maintenance on the brakes;
[1] - CHECKING THE BRAKE OPERATION
[2] - CHECKING THE BRAKE FLUID LEVEL
[3] - CHECKING THE FRONT BRAKE PADS
[4] - CHECKING THE REAR BRAKE PADS
[5] - BLEEDING THE HYDRAULIC BRAKE SYSTEM
[6] - CHECKING THE FRONT BRAKE HOSES
[7] - CHECKING THE REAR BRAKE HOSES
[8] - CHECKING THE BRAKE LIGHT SWITCHES
[9] - ADJUSTING THE REAR BRAKE LIGHT SWITCH
[10] - LUBRICATING THE BRAKE LEVER
[11] - LUBRICATING THE BRAKE PEDAL
[1] - CHECKING THE BRAKE OPERATION
© cvvmax December 2013
1. Check:
• Brake operation
If Brakes are not working properly -> Check the brake system.
© cvvmax December 2013
1. Check:
• Brake operation
If Brakes are not working properly -> Check the brake system.

Drive on the dry road, operate the front and rear brakes separately and check to see if the brakes are operating fully.
[2] - CHECKING THE BRAKE FLUID LEVEL
© cvvmax December 2013
1. Stand the vehicle on a level surface.
© cvvmax December 2013
1. Stand the vehicle on a level surface.

• Place the vehicle on a suitable stand.
• Make sure the vehicle is upright.
2. Check:
• Brake fluid level
If below the minimum level mark "a" -> Add the specified brake fluid to the proper
level.
• Make sure the vehicle is upright.
2. Check:
• Brake fluid level
If below the minimum level mark "a" -> Add the specified brake fluid to the proper
level.

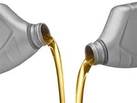
Specified brake fluid: DOT 4

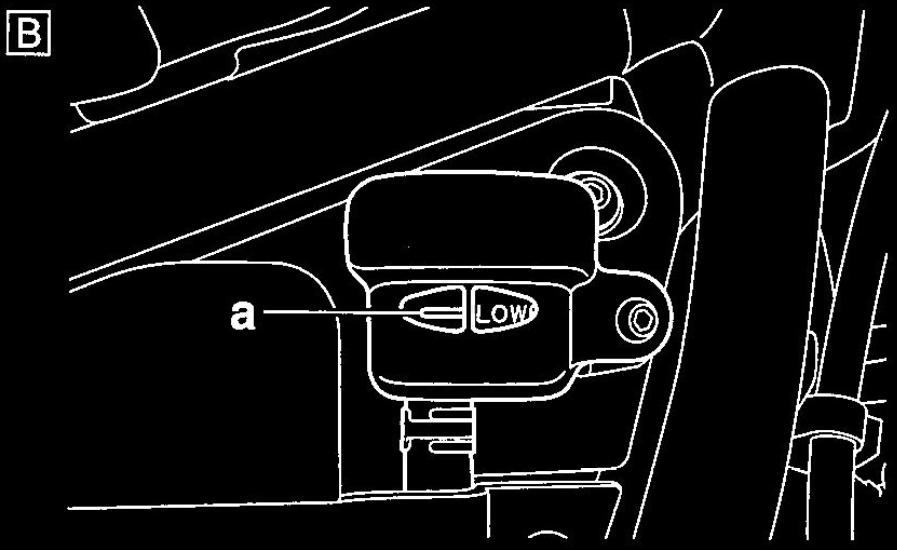
A. Front brake
B. Rear brake
B. Rear brake

• Use only the designated brake fluid. Other brake fluids may cause the rubber seals
to deteriorate, causing leakage and poor brake performance.
• Refill with the same type of brake fluid that is already in the system. Mixing brake
fluids may result in a harmful chemical reaction, leading to poor brake performance.
• When refilling, be careful that water does not enter the brake master cylinder
reservoir and brake fluid reservoir. Water will significantly lower the boiling point
of the brake fluid and could cause vapor lock.

Brake fluid may damage painted surfaces and plastic parts. Therefore, always clean up any spilt brake fluid immediately.

In order to ensure a correct reading of the brake fluid level, make sure the top of the brake master cylinder reservoir or brake fluid reservoir is horizontal.
[3] - CHECKING THE FRONT BRAKE PADS
© cvvmax December 2013
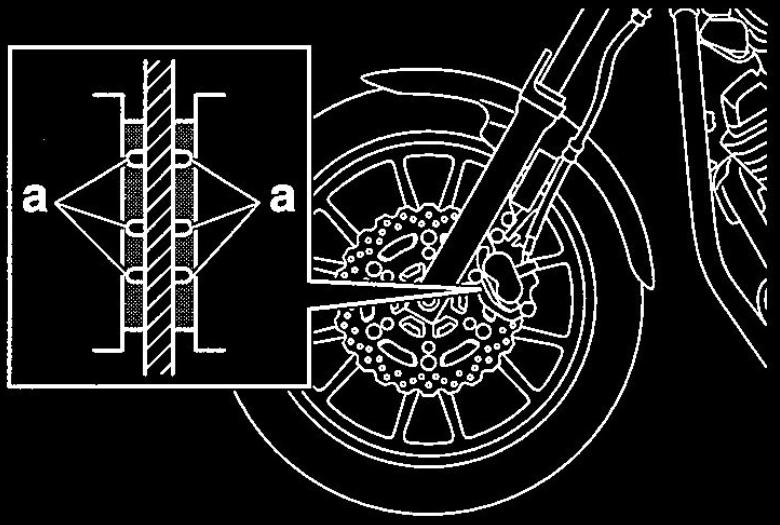
The following procedure applies to all of the brake pads.
1. Operate the brake.
2. Check:
• Front brake pad
If wear indicator grooves "a" almost disappeared -> Replace the brake pads as a set.
© cvvmax December 2013
The following procedure applies to all of the brake pads.
1. Operate the brake.
2. Check:
• Front brake pad
If wear indicator grooves "a" almost disappeared -> Replace the brake pads as a set.
[4] - CHECKING THE REAR BRAKE PADS
© cvvmax December 2013
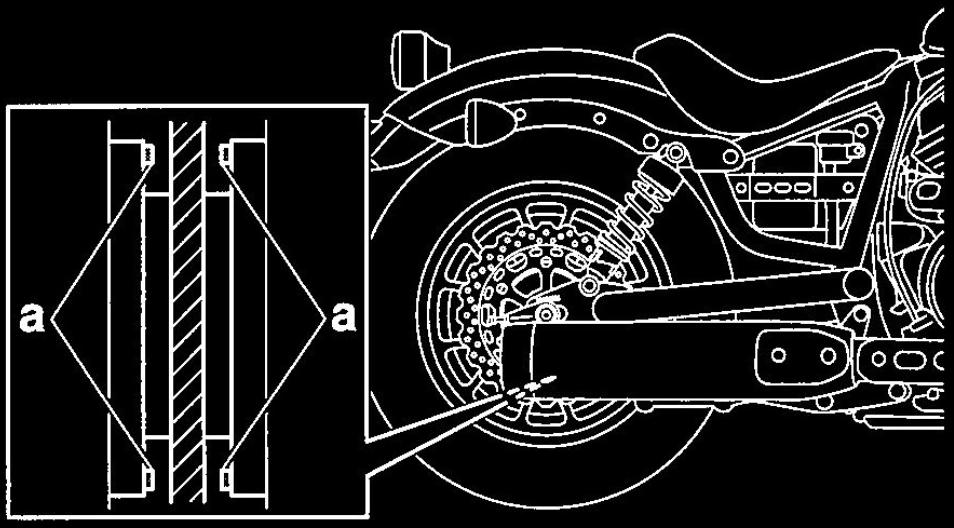
The following procedure applies to all of the
brake pads.
1. Operate the brake.
2. Check:
• Rear brake pad
If wear indicators "a" almost touch the brake disc -» Replace the brake pads as a set.
© cvvmax December 2013
The following procedure applies to all of the
brake pads.
1. Operate the brake.
2. Check:
• Rear brake pad
If wear indicators "a" almost touch the brake disc -» Replace the brake pads as a set.
[5] - BLEEDING THE HYDRAULIC BRAKE SYSTEM
© cvvmax December 2013
© cvvmax December 2013

Bleed the hydraulic brake system whenever:
• The system is disassembled.
• A brake hose is loosened, disconnected or replaced.
• The brake fluid level is very low.
• Brake operation is faulty.
• The system is disassembled.
• A brake hose is loosened, disconnected or replaced.
• The brake fluid level is very low.
• Brake operation is faulty.

• Be careful not to spill any brake fluid or allow the brake master cylinder reservoir
or brake fluid reservoir to overflow.
• When bleeding the hydraulic brake system, make sure there is always enough brake
fluid before applying the brake. Ignoring this precaution could allow air to enter
the hydraulic brake system, considerably lengthening the bleeding procedure.
• If bleeding is difficult, it may be necessary to let the brake fluid settle for a few
hours. Repeat the bleeding procedure when the tiny bubbles in the hose have
disappeared.
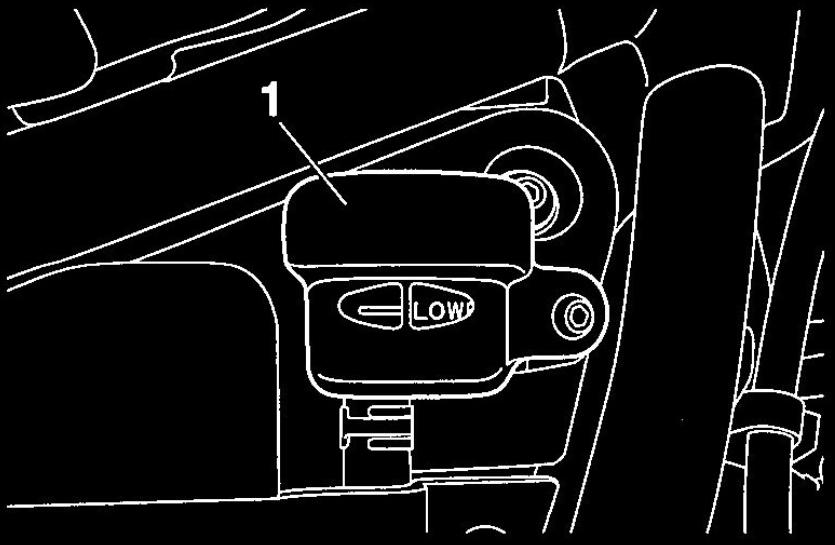
1. Remove:
• Brake fluid reservoir cover " 1 "
or brake fluid reservoir to overflow.
• When bleeding the hydraulic brake system, make sure there is always enough brake
fluid before applying the brake. Ignoring this precaution could allow air to enter
the hydraulic brake system, considerably lengthening the bleeding procedure.
• If bleeding is difficult, it may be necessary to let the brake fluid settle for a few
hours. Repeat the bleeding procedure when the tiny bubbles in the hose have
disappeared.
1. Remove:
• Brake fluid reservoir cover " 1 "

After removing the brake fluid reservoir cover, install the brake fluid reservoir temporarily.
2. Bleed:
• Hydraulic brake system
a. Fill the brake master cylinder reservoir or brake fluid reservoir to the proper level
with the specified brake fluid.
b. Install the diaphragm (brake master cylinder reservoir or brake fluid reservoir).
c. Connect a clear plastic hose "1" tightly to the bleed screw "2".
• Hydraulic brake system
a. Fill the brake master cylinder reservoir or brake fluid reservoir to the proper level
with the specified brake fluid.
b. Install the diaphragm (brake master cylinder reservoir or brake fluid reservoir).
c. Connect a clear plastic hose "1" tightly to the bleed screw "2".

A. Front brake caliper
B. Rear brake caliper
d. Put the other end of the hose into an open container.
e. Slowly apply the brake several times.
f. Fully squeeze the brake lever or fully depress the brake pedal and hold it in position.
g. Loosen the bleed screw.
B. Rear brake caliper
d. Put the other end of the hose into an open container.
e. Slowly apply the brake several times.
f. Fully squeeze the brake lever or fully depress the brake pedal and hold it in position.
g. Loosen the bleed screw.

Loosening the bleed screw will release the pressure and cause the brake lever to contact the throttle grip or the brake pedal to fully extend.
h. Tighten the bleed screw and then release the brake lever or brake pedal.
i. Repeat steps (e) to (h) until all of the air bubbles have disappeared from the brake
fluid in the plastic hose.
j. Tighten the bleed screw to specification.
h. Tighten the bleed screw and then release the brake lever or brake pedal.
i. Repeat steps (e) to (h) until all of the air bubbles have disappeared from the brake
fluid in the plastic hose.
j. Tighten the bleed screw to specification.

Brake caliper bleed screw
6 Nm (0.6 m-kgf, 4.3 ft-lbf)
k. Fill the brake master cylinder reservoir or brake fluid reservoir to the proper level
with the specified brake fluid.
6 Nm (0.6 m-kgf, 4.3 ft-lbf)
k. Fill the brake master cylinder reservoir or brake fluid reservoir to the proper level
with the specified brake fluid.

After bleeding the hydraulic brake system, check the brake operation.
3. Install:
• Brake fluid reservoir cover
3. Install:
• Brake fluid reservoir cover

Brake fluid reservoir cover bolt
2.8 Nm (0.28 m-kgf, 2.0 ft-lbf)
LOCTITE®
2.8 Nm (0.28 m-kgf, 2.0 ft-lbf)
LOCTITE®
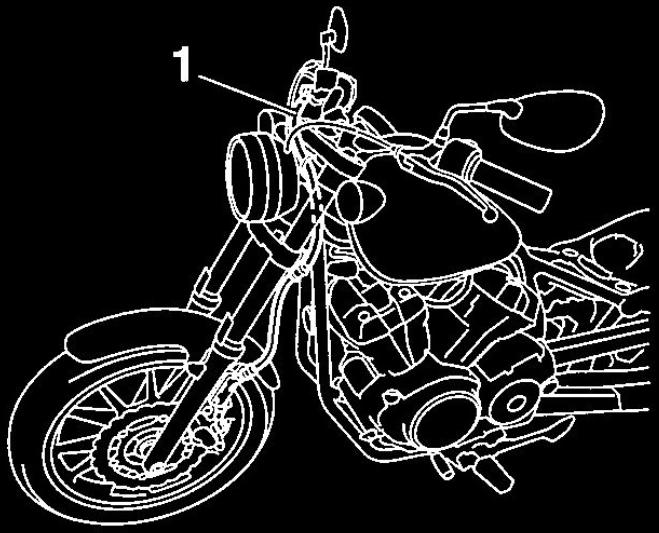
[6] - CHECKING THE FRONT BRAKE HOSES
© cvvmax December 2013
1. Check:
• Brake hose " 1 "
If there are Cracks/Damage/Wear -> Replace.
© cvvmax December 2013
1. Check:
• Brake hose " 1 "
If there are Cracks/Damage/Wear -> Replace.
2. Check:
• Brake hose holders
If loose -» Tighten the holder bolt.
3. Hold the vehicle upright and apply the brake several times.
4. Check:
• Brake hose
If there is brake fluid leakage -> Replace the brake hose.
• Brake hose holders
If loose -» Tighten the holder bolt.
3. Hold the vehicle upright and apply the brake several times.
4. Check:
• Brake hose
If there is brake fluid leakage -> Replace the brake hose.
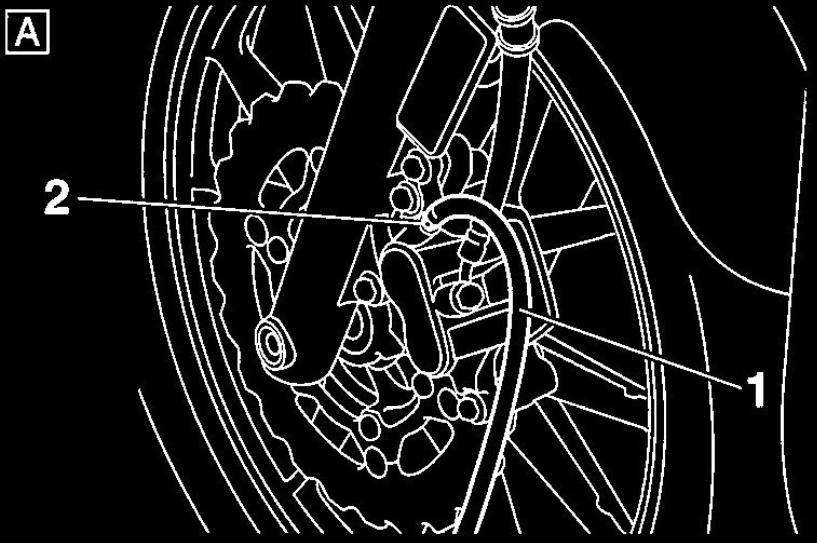
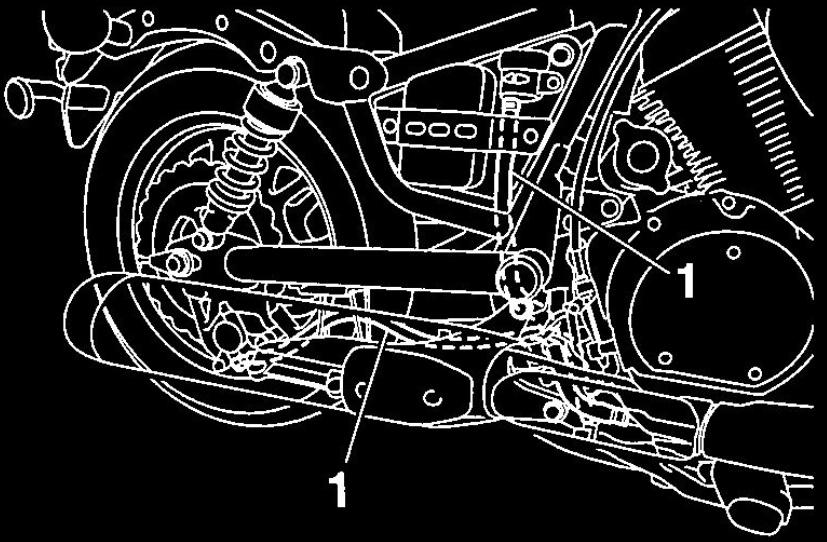
[7] - CHECKING THE REAR BRAKE HOSES
© cvvmax December 2013
The following procedure applies to all of the brake hoses and brake hose clamps.
1. Check:
• Brake hoses " 1 "
If there are Cracks/Damage/Wear -> Replace.
© cvvmax December 2013
The following procedure applies to all of the brake hoses and brake hose clamps.
1. Check:
• Brake hoses " 1 "
If there are Cracks/Damage/Wear -> Replace.
2. Check:
• Brake hose clamp
If loose -> Tighten the clamp bolt.
3. Hold the vehicle upright and apply the brake several times.
4. Check:
• Brake hoses
If there is brake fluid leakage -> Replace the damaged hose.
• Brake hose clamp
If loose -> Tighten the clamp bolt.
3. Hold the vehicle upright and apply the brake several times.
4. Check:
• Brake hoses
If there is brake fluid leakage -> Replace the damaged hose.
[8] - CHECKING THE BRAKE LIGHT SWITCHES
© cvvmax December 2013
1. Check:
• Front brake light switch operation
• Rear brake light switch operation
When operating the brake lever and brake pedal, confirm that the brake light turns on.
If Faulty -> Refer to the "Lights, Signals and Switches" General Maintenance Page.
© cvvmax December 2013
1. Check:
• Front brake light switch operation
• Rear brake light switch operation
When operating the brake lever and brake pedal, confirm that the brake light turns on.
If Faulty -> Refer to the "Lights, Signals and Switches" General Maintenance Page.
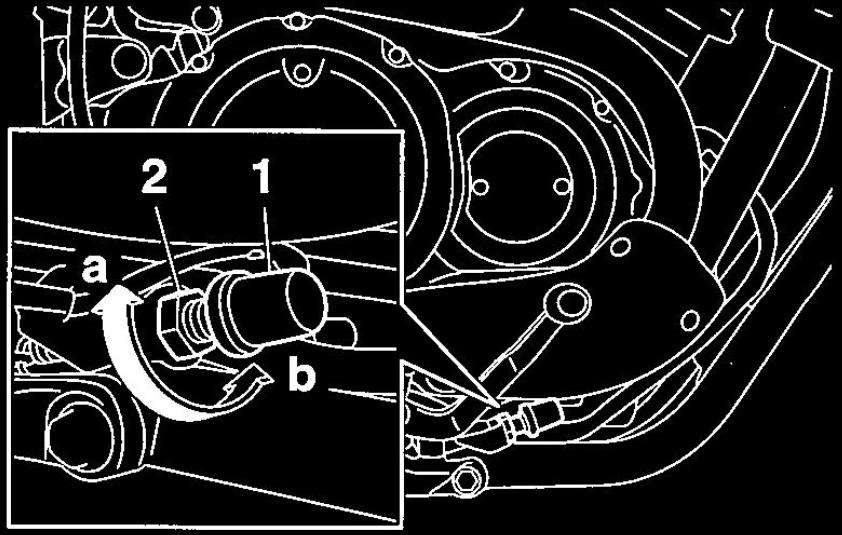
[9] - ADJUSTING THE REAR BRAKE LIGHT SWITCH
© cvvmax December 2013
© cvvmax December 2013

The rear brake light switch is operated by movement of the brake pedal. The rear
brake light switch is properly adjusted when the brake light comes on just before
the braking effect starts.
1. Check:
• Rear brake light operation timing
If incorrect -> Adjust.
2. Adjust:
• Rear brake light operation timing
a. Hold the main body " 1 " of the rear brake light switch so that it does not rotate
and turn the adjusting nut "2" in direction "a" or "b" until the rear brake light
comes on at the proper time.
Direction "a"
Brake light comes on sooner.
Direction "b"
Brake light comes on later.
[10] - LUBRICATING THE BRAKE LEVER
© cvvmax December 2013
Lubricate the pivoting point and metal-to-metal moving parts of the brake lever.
© cvvmax December 2013
Lubricate the pivoting point and metal-to-metal moving parts of the brake lever.

Recommended lubricant
Silicone grease
Silicone grease
[11] - LUBRICATING THE BRAKE PEDAL
© cvvmax December 2013
Lubricate the pivoting point and metal-to-metal moving parts of the brake pedal.
© cvvmax December 2013
Lubricate the pivoting point and metal-to-metal moving parts of the brake pedal.

Recommended lubricant
Lithium-soap-based grease
Lithium-soap-based grease
© 2013-15 cvvmax. No animals, HDs or Ducatis were harmed in the making of this site.