

The following sections included on this page, are for Engine Oil maintenance;
[1] - CHECKING THE ENGINE OIL LEVEL
[2] - CHANGING THE ENGINE OIL
[1] - CHECKING THE ENGINE OIL LEVEL
[2] - CHANGING THE ENGINE OIL
[1] - CHECKING THE ENGINE OIL LEVEL
© cvvmax December 2013
1. Stand the vehicle on a level surface.
© cvvmax December 2013
1. Stand the vehicle on a level surface.

• Place the vehicle on the suitable stand.
• Make sure that the vehicle is upright.
2. Let the engine idle for a few minutes, and then turn it off.
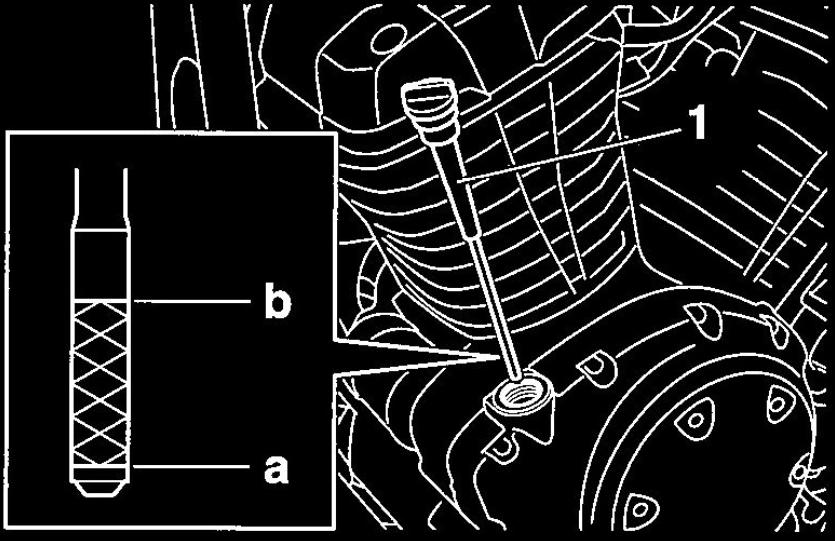
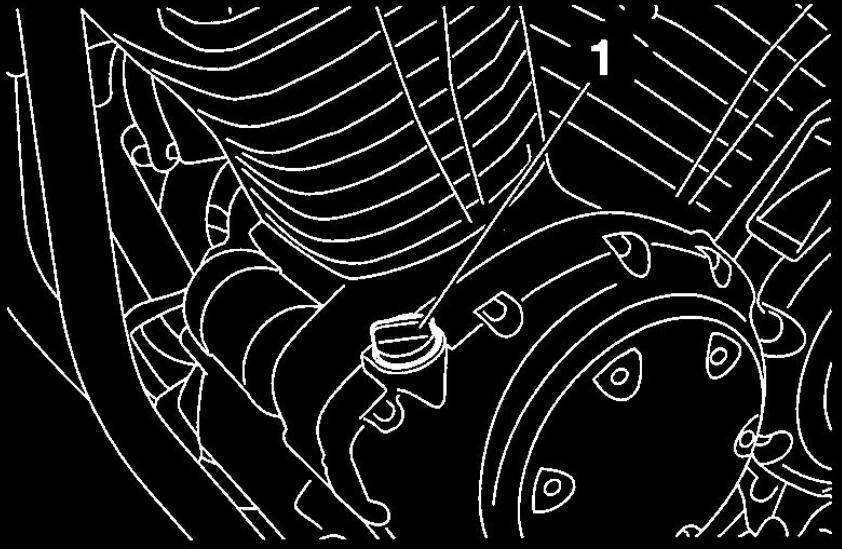
3. Remove:
• Dipstick " 1 "
4. Check:
• Engine oil level
The engine oil level should be between the minimum level mark "a" and maximum
level mark "b".
If below the minimum level mark -> Add the recommended engine oil to the proper
level.
• Make sure that the vehicle is upright.
2. Let the engine idle for a few minutes, and then turn it off.
3. Remove:
• Dipstick " 1 "
4. Check:
• Engine oil level
The engine oil level should be between the minimum level mark "a" and maximum
level mark "b".
If below the minimum level mark -> Add the recommended engine oil to the proper
level.

• Before checking the engine oil level, wait a few minutes until the oil has settled.
• Do not screw the dipstick in when inspecting the oil level.
• Do not screw the dipstick in when inspecting the oil level.

Recommended brand
YAMALUBE
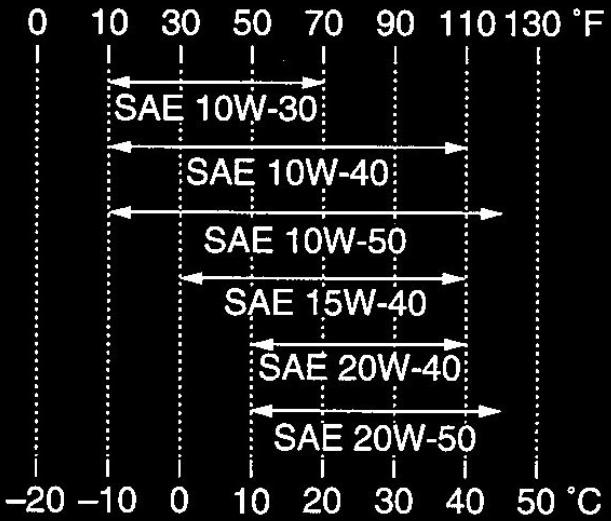
Type
SAE 10W-30,10W-40,10W-50, 15W-40, 20W-40 or 20W-50
Recommended engine oil grade
API service SG type or higher,
JASO standard MA
YAMALUBE
Type
SAE 10W-30,10W-40,10W-50, 15W-40, 20W-40 or 20W-50
Recommended engine oil grade
API service SG type or higher,
JASO standard MA

• Engine oil also lubricates the clutch and the wrong oil types or additives could cause
clutch slippage.
Therefore, do not add any chemical additives or use engine oils with a grade of CD
or higher and do not use oils labeled "ENERGY CONSERVING II" or higher.
• Do not allow foreign materials to enter the crankcase.
5. Start the engine, warm it up for several minutes, and then turn it off.
6. Check the engine oil level again.

Before checking the engine oil level, wait a few minutes until the oil has settled.
7. Install:
• Dipstick
7. Install:
• Dipstick
[2] - CHANGING THE ENGINE OIL
© cvvmax December 2013
1. Start the engine, warm it up for several minutes, and then turn it off.
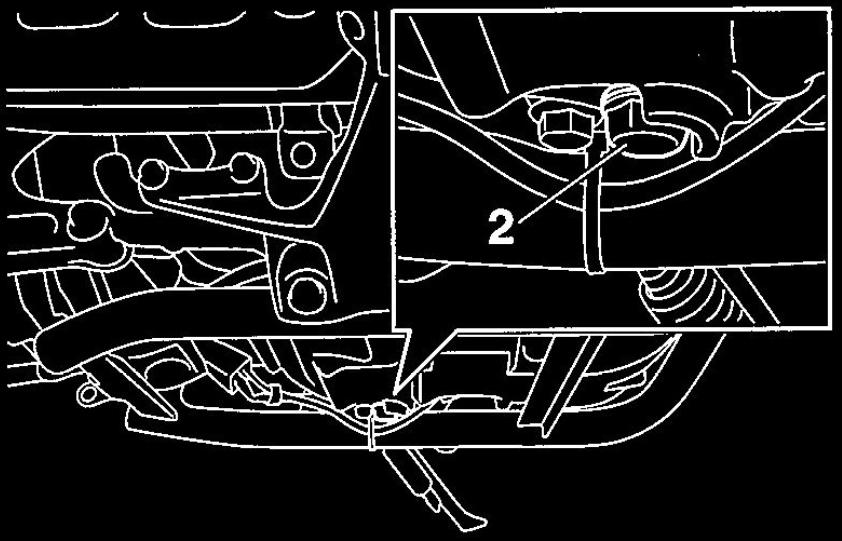
2. Place a container under the engine oil drain bolt.
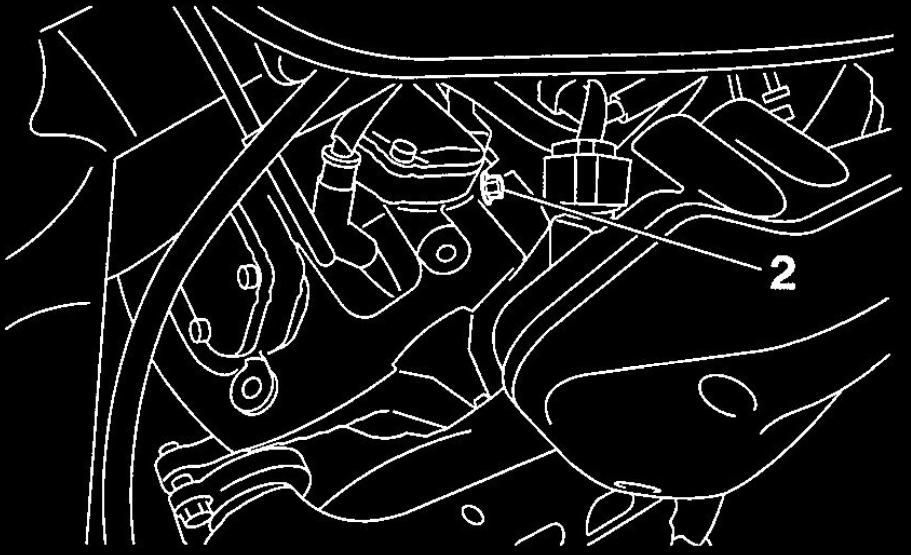
3. Remove:
• Dipstick " 1 " (along with the O-ring)
• Engine oil drain bolt "2" (along with the gasket)
© cvvmax December 2013
1. Start the engine, warm it up for several minutes, and then turn it off.
2. Place a container under the engine oil drain bolt.
3. Remove:
• Dipstick " 1 " (along with the O-ring)
• Engine oil drain bolt "2" (along with the gasket)
4. Drain:
• Engine oil (completely from the crankcase)
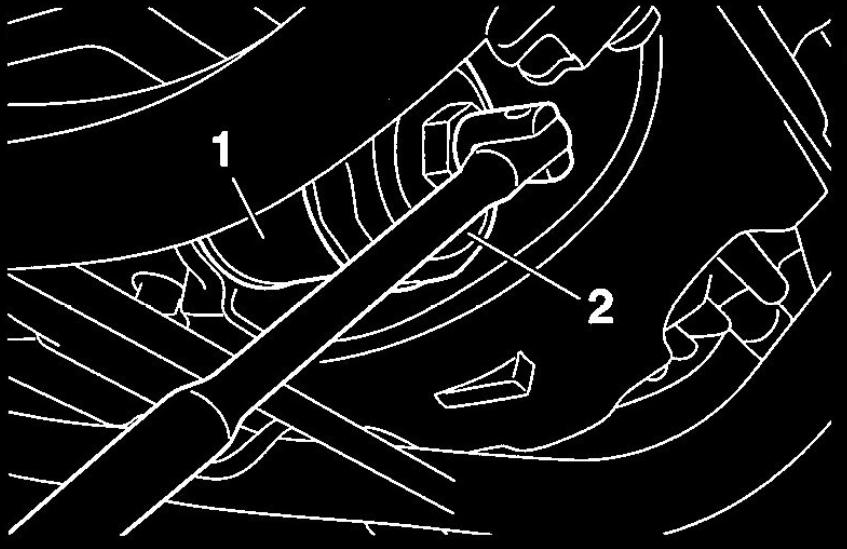
5. If the oil filter cartridge is also to be replaced, perform the following procedure.
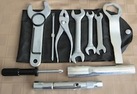
a. Remove the oil filter cartridge " 1 " with an oil filter wrench "2".
• Engine oil (completely from the crankcase)
5. If the oil filter cartridge is also to be replaced, perform the following procedure.
a. Remove the oil filter cartridge " 1 " with an oil filter wrench "2".

Oil filter wrench
90890-01426
YU-38411
90890-01426
YU-38411
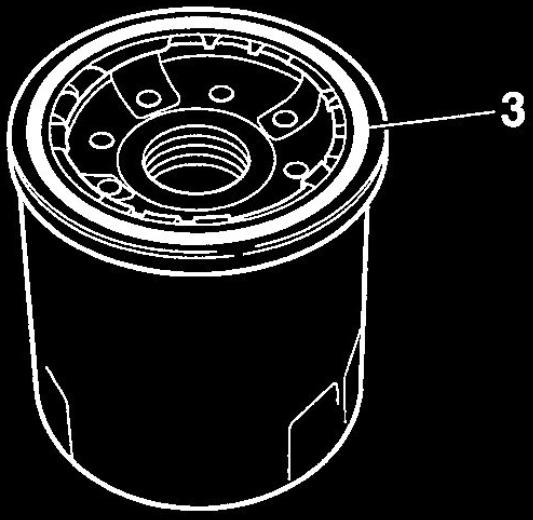
b. Lubricate the O-ring "3" of the new oil filter cartridge with a thin coat of engine
oil.
oil.

Make sure the O-ring "3" is positioned correctly in the groove of the oil filter
cartridge.
cartridge.
c. Tighten the new oil filter cartridge to specification with an oil filter wrench.

Oil filter cartridge
17 Nm (1.7 m-kgf, 12 ft-lbf)
6. Install:
• Engine oil drain bolt (along with a NEW gasket)
17 Nm (1.7 m-kgf, 12 ft-lbf)
6. Install:
• Engine oil drain bolt (along with a NEW gasket)

Engine oil drain bolt
43 Nm (4.3 m-kgf, 31 ft-lbf)
7. Fill:
• Crankcase (with the specified amount of the recommended engine oil)
8. Install:
• Dipstick (along with the O-ring E^fl)
9. Check:
• Engine oil level
43 Nm (4.3 m-kgf, 31 ft-lbf)
7. Fill:
• Crankcase (with the specified amount of the recommended engine oil)
8. Install:
• Dipstick (along with the O-ring E^fl)
9. Check:
• Engine oil level

Engine oil quantity
Quantity (disassembled)
4.30 L (4.55 US qt, 3.78 Imp.qt)
Without oil filter cartridge replacement
3.70 L (3.91 US qt, 3.26 Imp.qt)
With oil filter cartridge replacement
4.00 L (4.23 US qt, 3.52 Imp.qt)
10. Start the engine, warm it up for several minutes, and then turn it off.
11. Check:
• Engine (for engine oil leaks)
12. Check:
• Engine oil level
13. Remove:
• Rear cylinder right cover
• Rear cylinder right cover bracket
14. Check:
• Engine oil pressure
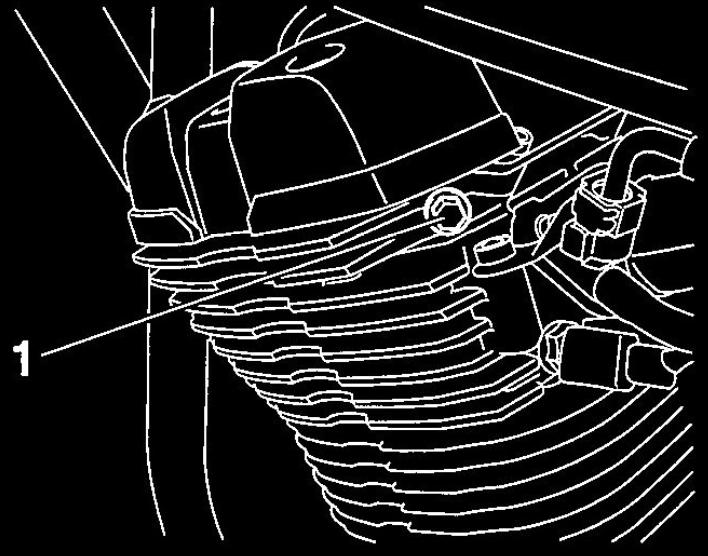
a. Slightly loosen the front cylinder oil check bolt "1" and rear cylinder oil check
bolt "2".
Quantity (disassembled)
4.30 L (4.55 US qt, 3.78 Imp.qt)
Without oil filter cartridge replacement
3.70 L (3.91 US qt, 3.26 Imp.qt)
With oil filter cartridge replacement
4.00 L (4.23 US qt, 3.52 Imp.qt)
10. Start the engine, warm it up for several minutes, and then turn it off.
11. Check:
• Engine (for engine oil leaks)
12. Check:
• Engine oil level
13. Remove:
• Rear cylinder right cover
• Rear cylinder right cover bracket
14. Check:
• Engine oil pressure
a. Slightly loosen the front cylinder oil check bolt "1" and rear cylinder oil check
bolt "2".
b. Start the engine and keep it idling until engine oil starts to seep from the oil
check bolts. If no engine oil comes out after one minute, turn the engine off
so that it will not seize.
c. Check the engine oil passages, the oil filter cartridge and the oil pump for
damage or leakage.
d. Start the engine after solving the problem(s) and check the engine oil pressure
again.
e. Tighten the oil check bolts to specification.

Oil check bolt
15 Nm (1.5 m-kgf, 11 ft-lbf)
15. lnstall:
• Rear cylinder right cover bracket
• Rear cylinder right cover
15 Nm (1.5 m-kgf, 11 ft-lbf)
15. lnstall:
• Rear cylinder right cover bracket
• Rear cylinder right cover

Rear cylinder right cover bracket bolt
20 Nm (2.0 m-kgf, 14 ft-lbf)
Rear cylinder right cover bolt
8 Nm (0.8 m-kgf, 5.8 ft-lbf)
20 Nm (2.0 m-kgf, 14 ft-lbf)
Rear cylinder right cover bolt
8 Nm (0.8 m-kgf, 5.8 ft-lbf)

© 2013-15 cvvmax. No animals, HDs or Ducatis were harmed in the making of this site.