
The following sections included on this page, are for maintenance on the Clutch;
[1] - CHECKING THE REAR SHOCK ABSORBER ASSEMBLIES
[2] - ADJUSTING THE REAR SHOCK ABSORBER ASSEMBLIES
(For Standard "Bolt" Model)
[3] - ADJUSTING THE REAR SHOCK ABSORBER ASSEMBLIES
(For R-Spec "Bolt" Model)
[1] - CHECKING THE REAR SHOCK ABSORBER ASSEMBLIES
[2] - ADJUSTING THE REAR SHOCK ABSORBER ASSEMBLIES
(For Standard "Bolt" Model)
[3] - ADJUSTING THE REAR SHOCK ABSORBER ASSEMBLIES
(For R-Spec "Bolt" Model)
[1] - CHECKING THE REAR SHOCK ABSORBER ASSEMBLIES
© cvvmax December 2013
1. Check:
• Damper rod
• Oil leakage
• Spring
2. Check:
• Operation
Pump the rear shock absorber assemblies up and down several times.
If there is Unsmooth Operation -> Replace rear shock absorber assembly.
© cvvmax December 2013
1. Check:
• Damper rod
• Oil leakage
• Spring
2. Check:
• Operation
Pump the rear shock absorber assemblies up and down several times.
If there is Unsmooth Operation -> Replace rear shock absorber assembly.
[2] - ADJUSTING THE REAR SHOCK ABSORBER ASSEMBLIES
(For Standard "Bolt" Model)
© cvvmax December 2013
The following procedure applies to both of the rear shock absorber assemblies.
(For Standard "Bolt" Model)
© cvvmax December 2013
The following procedure applies to both of the rear shock absorber assemblies.

• Securely support the vehicle so that there is no danger of it falling over.
• Always adjust both rear shock absorber assemblies evenly. Uneven adjustment
can result in poor handling and loss of stability.
Spring preload
• Always adjust both rear shock absorber assemblies evenly. Uneven adjustment
can result in poor handling and loss of stability.
Spring preload

Never go beyond the maximum or minimum adjustment positions.
1. Adjust:
• Spring preload
1. Adjust:
• Spring preload

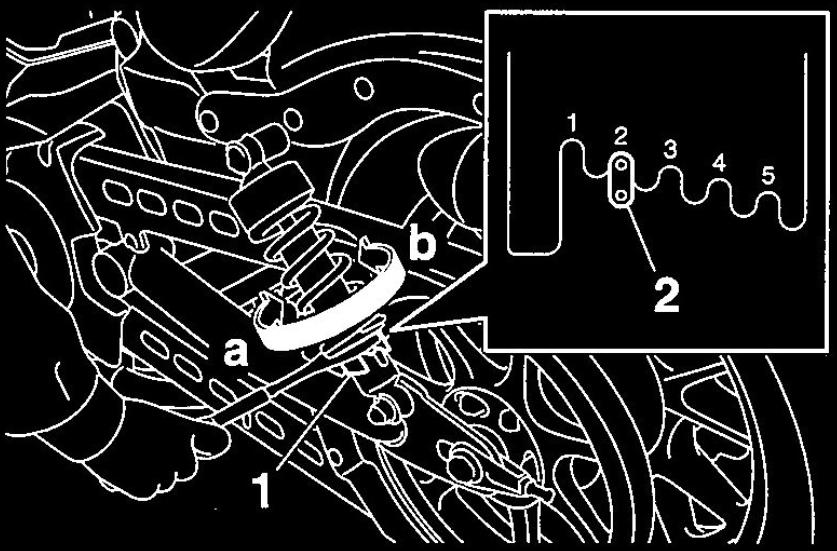
Adjust the spring preload with the special wrench and extension bar included in the owner's tool kit 2.
a. Turn the adjusting ring " 1 " in direction "a" or "b".
b. Align the desired position on the adjusting ring with the stopper "2".
Direction "a"
Spring preload is increased (suspension is harder).
Direction "b"
Spring preload is decreased (suspension is softer).
a. Turn the adjusting ring " 1 " in direction "a" or "b".
b. Align the desired position on the adjusting ring with the stopper "2".
Direction "a"
Spring preload is increased (suspension is harder).
Direction "b"
Spring preload is decreased (suspension is softer).

Adjusting positions;
Standard: 2
Minimum (soft): 1
Maximum (hard): 5
Standard: 2
Minimum (soft): 1
Maximum (hard): 5
[3] - ADJUSTING THE REAR SHOCK ABSORBER ASSEMBLIES
(For R-Spec "Bolt" Model)
© cvvmax December 2013
The following procedure applies to both of the rear shock absorber assemblies.
(For R-Spec "Bolt" Model)
© cvvmax December 2013
The following procedure applies to both of the rear shock absorber assemblies.

• Securely support the vehicle so that there is no danger of it falling over.
• Always adjust both rear shock absorber assemblies evenly. Uneven adjustment
can result in poor handling and loss of stability.
Spring preload
• Always adjust both rear shock absorber assemblies evenly. Uneven adjustment
can result in poor handling and loss of stability.
Spring preload

Never go beyond the maximum or minimum adjustment positions.
1. Adjust:
• Spring preload
1. Adjust:
• Spring preload

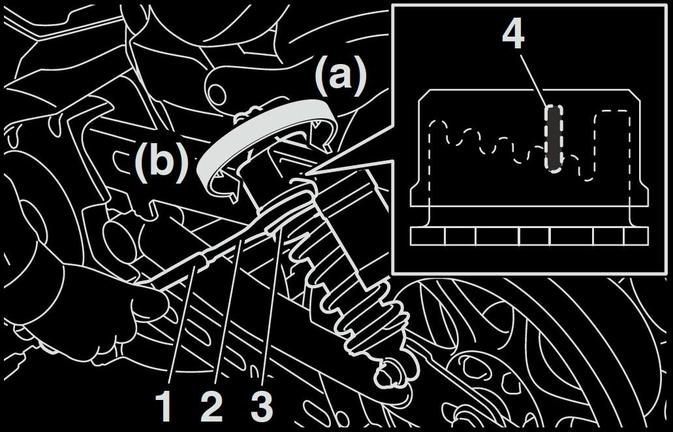
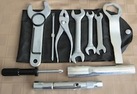
Adjust the spring preload with the special wrench "2" and extension bar "1" included in the owner's tool kit 2.
a. Turn the adjusting ring " 3 " in direction "a" or "b".
b. Align the desired position on the adjusting ring with the stopper "4".
Direction "a"
Spring preload is increased (suspension is harder).
Direction "b"
Spring preload is decreased (suspension is softer).
a. Turn the adjusting ring " 3 " in direction "a" or "b".
b. Align the desired position on the adjusting ring with the stopper "4".
Direction "a"
Spring preload is increased (suspension is harder).
Direction "b"
Spring preload is decreased (suspension is softer).

Adjusting positions;
Standard: 1
Minimum (soft): 0
Maximum (hard): 4
Standard: 1
Minimum (soft): 0
Maximum (hard): 4


© 2013-15 cvvmax. No animals, HDs or Ducatis were harmed in the making of this site.