

CHECKING THE SPARK PLUGS
© cvvmax December 2013
The following procedure applies to all of the spark plugs.
1. Remove:
• Rear cylinder right cover
2. Disconnect:
• Spark plug cap
3. Remove:
• Spark plug
© cvvmax December 2013
The following procedure applies to all of the spark plugs.
1. Remove:
• Rear cylinder right cover
2. Disconnect:
• Spark plug cap
3. Remove:
• Spark plug

Before removing the spark plugs, blow away any dirt accumulated in the spark plug wells with compressed air to prevent it from falling into the cylinders.
4. Check:
• Spark plug type
If Incorrect -> Change.
4. Check:
• Spark plug type
If Incorrect -> Change.

Manufacturer/Model
NGK/CPR7EA-9
5. Check:
• Electrode
If Damaged/Worn -> Replace the spark plug.
• Insulator
If it has an abnormal color -> Replace the spark plug.
Normal color is medium-to-light tan.
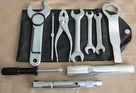
6. Clean:
• Spark plug
(with a spark plug cleaner or wire brush)
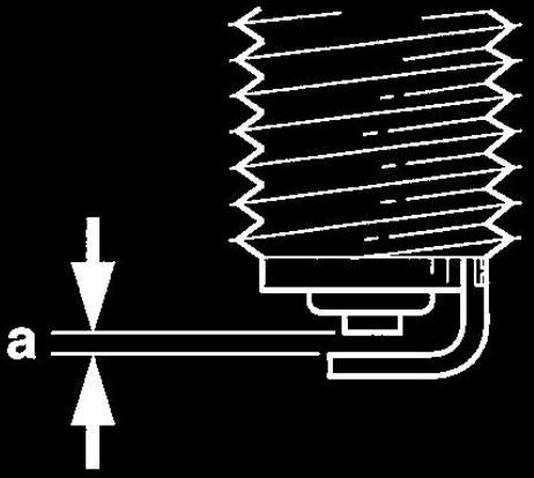
7. Measure:
• Spark plug gap "a"
(with a wire thickness gauge)
If out of specification -> Regap.
NGK/CPR7EA-9
5. Check:
• Electrode
If Damaged/Worn -> Replace the spark plug.
• Insulator
If it has an abnormal color -> Replace the spark plug.
Normal color is medium-to-light tan.
6. Clean:
• Spark plug
(with a spark plug cleaner or wire brush)
7. Measure:
• Spark plug gap "a"
(with a wire thickness gauge)
If out of specification -> Regap.

Spark plug gap
0.8-0.9 mm (0.031-0.035 in)
0.8-0.9 mm (0.031-0.035 in)
8. Install:
• Spark Plug
• Spark Plug

Spark plug
13 Nm (1.3 m-kgf, 9.4 ft-lbf)
13 Nm (1.3 m-kgf, 9.4 ft-lbf)

Before installing the spark plug, clean the spark plug and gasket surface.
9. Connect:
• Spark plug cap
10. lnstall:
• Rear cylinder right cover
9. Connect:
• Spark plug cap
10. lnstall:
• Rear cylinder right cover


© 2013-15 cvvmax. No animals, HDs or Ducatis were harmed in the making of this site.