|
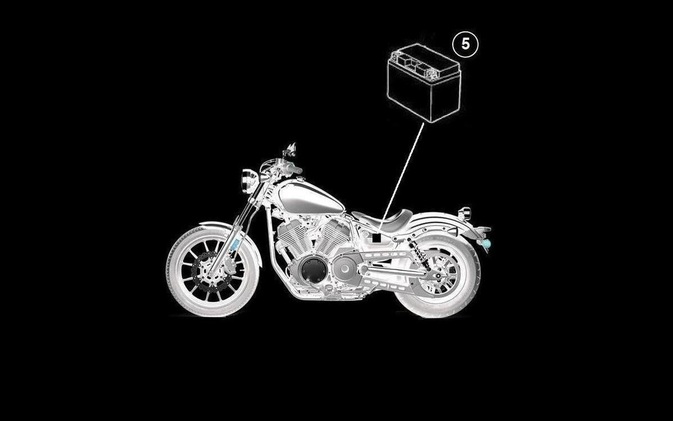
5. Battery (12VDC/12A)
|
CHECKING AND CHARGING THE BATTERY
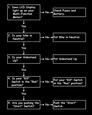
1. Remove:
• Left side cover
• Rider seat
• ECU bracket
• Battery cover
2. Disconnect:
• Battery leads (from the battery terminals)
1. Remove:
• Left side cover
• Rider seat
• ECU bracket
• Battery cover
2. Disconnect:
• Battery leads (from the battery terminals)

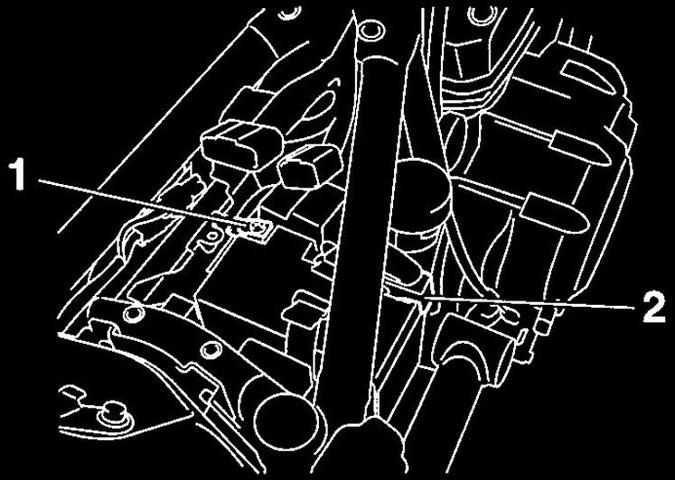
First, disconnect the negative battery lead "1", then the positive battery lead "2".
|
3. Remove:
• Battery
4. Check:
• Battery charge
a. Connect a pocket tester to the battery terminals.
• Positive tester probe -> positive battery terminal
• Negative tester probe -> negative battery terminal
b. Check the charge of the battery.
If measured Charge is 12.7 VDC or less, recharge the Battery.
5. Charge:
• Battery
< WARNING >
Do not quick charge the battery.
12.8 VDC or more — Charging is complete.
12.7 VDC or less — Recharging is required.
Under 12.0 VDC — Replace the battery.
6. Install:
• Battery
7. Connect:
• Battery leads (to the battery terminals)
• Battery
4. Check:
• Battery charge
a. Connect a pocket tester to the battery terminals.
• Positive tester probe -> positive battery terminal
• Negative tester probe -> negative battery terminal
b. Check the charge of the battery.
If measured Charge is 12.7 VDC or less, recharge the Battery.
5. Charge:
• Battery
< WARNING >
Do not quick charge the battery.
12.8 VDC or more — Charging is complete.
12.7 VDC or less — Recharging is required.
Under 12.0 VDC — Replace the battery.
6. Install:
• Battery
7. Connect:
• Battery leads (to the battery terminals)

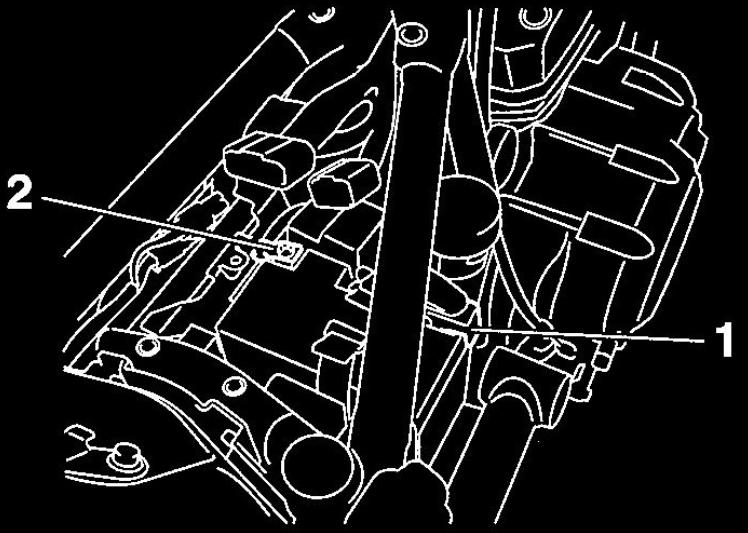
Route the positive battery lead under the negative battery lead, making sure not to route it
on top of the relay unit. |

First, connect the positive battery lead "1' then the negative battery lead "2".
|
8. Check:
• Battery terminals
If Dirty -> Clean with a wire brush.
If there are Loose Connections -> Connect properly.
9. Lubricate:
• Battery terminals
• Battery terminals
If Dirty -> Clean with a wire brush.
If there are Loose Connections -> Connect properly.
9. Lubricate:
• Battery terminals

|
Recommended lubricant;
Dielectric grease |
10. lnstall:
• Battery cover
• ECU bracket
• Rider seat
• Left side cover
• Battery cover
• ECU bracket
• Rider seat
• Left side cover

© 2013-15 cvvmax. No animals, HDs or Ducatis were harmed in the making of this site.